Yosemite In November: Conditions, Things to Do and Rainy Day Activities

cottonwood leaves in fall colors

What to do in Yosemite in November?

November is one of the least crowded times in Yosemite. Parking lots that fill by 9am in the summer are half-empty at noon in November. Nature is quieter too. Bears are typically busy putting on fat for hibernation and, if the snows come early, may even bed down for the winter before the end of November.

But it is also the time of year when the weather becomes less predictable, so you need to be ready for anything and for changing conditions. In most years, all roads will be open on November 1, but there’s a good chance the Glacier Point Road and the Tioga Pass Road will be closed by the end of the month.

Contents

The Two Rules for a Good November Trip

The low crowds are partly a result of school and holiday schedules, but also the unpredictable weather. I can tell you right now what the weather will be like on July 25, 2029 (clear skies, hot and dry, hazy, possibly heavy smoke from fires). But I don’t know what the weather will be on November 25, which is only 20 days away as I write this. It could be a warm fall day that sees me getting ready to run in shorts or a fierce winter day where I’m pulling out the skis. You just don’t know.

So the key to making the most of Yosemite in November, as we’ve learned from 17 years of living here and over 35 years of recreating here (as of November 2020), is flexibility. The following rules of thumb apply:

  1. Be ready to use tire chains, though you probably won’t.
  2. Be ready to hike in the rain and snow, though you probably won’t.

If you’re prepared for that, you can fill up a vacation (or several weekends) with Yosemite activities.
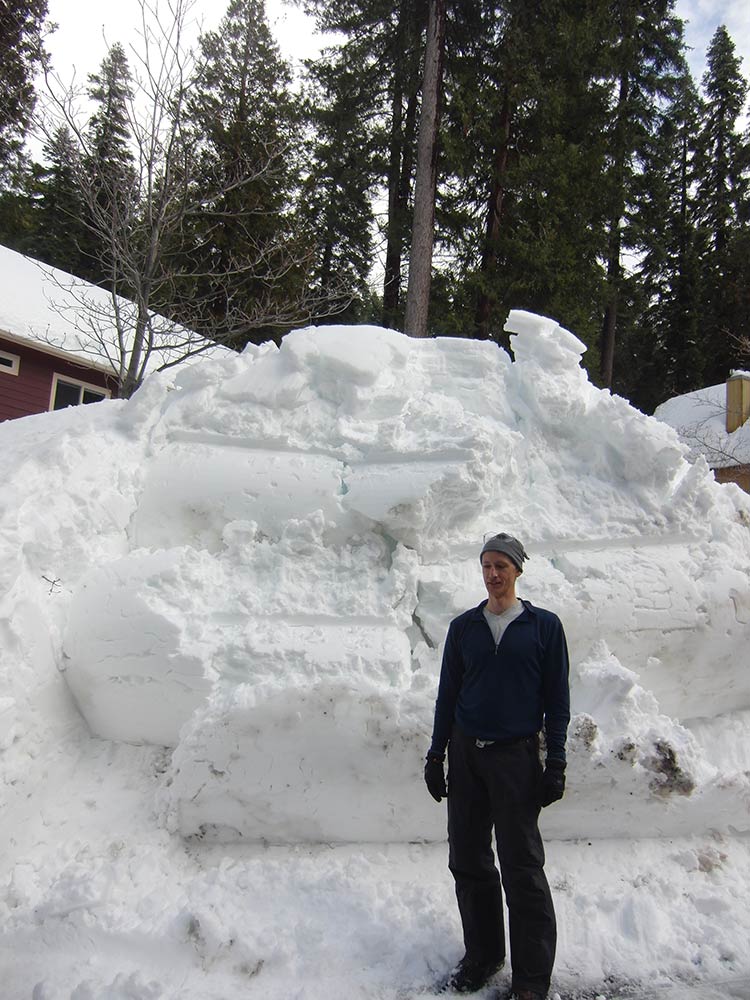
This is meant to show the range of conditions, but does not represent the frequency of those conditions. We tend to take more photos when it’s more dramatic, so this gallery might give you the impression that you should definitely pack your skis. In the large majority of years, you shouldn’t.

November Weather

If we look at averages for Yosemite Valley weather, it looks like this:

  • Average daily high: 56F/13C.
  • Average daily low: 33F/1C.
  • Average monthly precipitation: 4.6in/117mm.

That said, as you know, if it’s 120 degrees one day and zero the next, the average is a wonderful 60 degrees. November weather can range from nice hiking weather where you keep your jacket in the pack all day, to, albeit rarely, a fierce snow storm that can drop two feet of snow. Again, November demands flexibility.

From the middle of October on, we are in the rainy season (hopefully) and any given period can bring rain or snow or gorgeous warm days. John Dill, in his forward to the rock climbing guidebook, likes to point out that on October 11, 1983, a climber on El Capitan collapsed from heat exhaustion. On October 11, 1984, a party on Washington Column had to be rescued due to hypothermia.

Your best bet is to keep an eye on the Yosemite weather forecast and make your decisions on what clothes and gear to bring once you have a clearer sense of the weather.

But what if it snows or rains? What then?

If you’re willing to get a little wet, then pretty much everything is still on the table. If you’re not a fan of a long day out in the rain, there are still a number of indoor or shorter activities that make for a nice pastime on a stormy day. Regardless, it’s worth it to get out. There’s a reason that the pro photographers all come out of the woodwork when the storms roll in. That’s when you see Yosemite at its most dramatic. Most visitors aren’t going to hope for storms, but if it is stormy, you should make the most of it.

I’m going to start with some options that are easy, low-activity and in many cases indoors and move to harder, longer options. If you’re a hardy hiker and don’t mind getting wet, even rain shouldn’t stop you from any of these.

Indoor or Mostly Indoor Activities

Let’s assume it’s raining or snowing and you simply don’t want to do deal with it. What is there to do? Quite a bit actually. Note that since 2020, some of these options have been impacted by Covid-19 and who knows what the future will bring in any given year.

  • First, we think Alpine Escape is a pretty comfy place to hunker down in a storm. It has a full kitchen, central heat, a fireplace for ambiance and backup in event of a power outage, a large-screen TV with a Blu-Ray player and selection of movies and a handful of board games. We, unfortunately, are stuck with satellite internet, which is not really adequate for streaming movies, but it is fast enough to surf the web. Obviously, you’re not coming to Yosemite to sit around inside, but that’s just to say that if you go out in the rain or snow and get chilled, you’ll have a very comfy place to warm up in (and a clothes dryer to get your clothes dried out of the next day).
  • The Yosemite Valley Visitor Center has a nice set of exhibits on the history of Yosemite from geological times to the present. They show a movie every thirty minutes on Yosemite. As I write this, it alternates between two different movies, both of which I think are well worth watching. Right next door, the Yosemite Museum is small, but has some interesting artifacts from the early days of the park, representing both Indian and settler culture. Also, there is usually an Indian Cultural Demonstrator at the museum who can talk about the culture and also, depending on the person, show you traditional techniques of making baskets, rope, arrowheads and more. If your kids or you (no age limit) are doing the Junior Ranger program, a chat with the cultural demonstrator counts as a ranger talk. Finally, just behind the Museum is the Indian Village, which is also worth a walk (though that is actually outdoors).
  • The Ahwahnee Hotel (Yosemite Valley) helped set the style of architecture for much of the parks (“parkitecture” as some call it). The dining room, which looks like it could easily house a school for wizards, is worth a look even if you don’t want to pay Ahwahnee prices for a meal (though lunch is not outrageously expensive). There are also historic tours of the hotel that are fun — Presidents Kennedy and Obama stayed here, as did Queen Elizabeth II.
  • Wawona Hotel, Hill Studio and the Pioneer History Center (Wawona). This is the Wawona equivalent of the Valley Visitor Center, Majestic Hotel, and the Indian Village. Like the Indian Village, the Pioneer History Center is more of an outdoor activity. It includes a covered bridge (covered by the Washburn brothers, from my home state of Vermont where covered bridges were the norm), the old jail, Wells Fargo office and other buildings from the settler days all assembled in one place. The Wawona Hotel is fully indoors and though no president has stayed there, President Theodore Roosevelt ate lunch there on his way to the Mariposa Grove during his Yosemite visit in 1903. It’s a stately old Victorian hotel that is a wonderful place to stop for a hot chocolate on a blustery day. I know firsthand, because I have hunkered down here a few evenings on my way home from work while waiting for the road to clear after an accident. If you’re lucky, you’ll land there on a night that Tom Bopp is at the piano, playing songs from the 1800s and telling stories of the early days of the park (this is several evenings a week, usually beginning around 5pm). If you’re there during the day, the Hill Studio in the Wawona Visitor Center has some remarkable early paintings of the park and is worth a quick look.
  • Drive Highway 140 to El Portal. This may seem like an odd suggestion, but in a heavy rain, this is a fun drive. You’ll go past Cascade Falls, but also see several other waterfalls that only run during a rainstorm. During the heavy rains last January, we saw at least a couple of falls we had never seen before. In a light rain, this may not be worth it, but in a heavy rain and perhaps even the day after, it can be great. There are many cascades that you only see during or right after a storm. One caveat: beware of falling rocks, especially if it’s the first rain of the season.
  • Drive anywhere. For that matter, just go for a drive. Clouds and storms make for dramatic scenery and great photography.

Short Activities for a Rainy or Snowy Day

These are all worthwhile activities rain or shine, but let’s say it’s raining and you don’t want to hike one of the long trails, but you still want to get outdoors and see the park, where can you go? So many options, but to choose a few that may be better in the rain or snow than in the shine:

  • Track animals. If it’s snowing enough to collect on the ground, my absolute favorite activity is to pick an obscure trail that doesn’t get much traffic and follow animal tracks for a few hours. November is a great time for this because animals that may hibernate (bears, some squirrels) or go down to lower elevations in winter (mountain lions, deer) will often still be active. Get going early if you can. Once the sun melts the snow off the trees, the tracks are harder to see and it can feel like it’s raining in the deep forest. Otherwise, just find a set of tracks and follow them for a while. It’s a great way to learn about animal behavior.
  • Lower Yosemite Falls Loop (Yosemite Valley). If it’s raining hard enough that you don’t want to do a long hike, by definition the water will be flowing in the falls. When the falls are up, you’ll get wet standing on the bridge at lower falls anyway, so the rain shouldn’t be a deterrent. This is only about a 10-minute flat walk from the Yosemite Valley Lodge or about 45 minutes if you do the whole Lower Falls Loop. You can go back to the Mountain Room Bar for a cup of hot chocolate. If you’re lucky, you’ll score a place next to the fireplace.
  • Bridalveil Fall (Yosemite Valley). This is just a five minute walk from the parking lot. Like Yosemite Falls, rain or shine you’re going to get wet at the viewing point if the falls are in high flow, so there’s no reason not go in the rain when there’s some extra water in the falls!
  • Mirror Lake Loop (Yosemite Valley). This is a little longer, but unless the cloud ceiling is very low, it will give you spectacular looks at Half Dome and is only about a mile of mostly flat walking each way. If you’re feeling good, you can do the whole loop, which is about seven miles. Get off the free shuttle at stop #17 (not running in 2021, so that adds about a quarter mile each way if you park at the old stables lot near North Pines campground).
  • Photography at Tunnel View and Artist’s Point (Yosemite Valley). In the summer, if you go to Tunnel View at the exit of the Wawona Tunnel, you’ll see crowds of people with their cameras taking pictures. What you will not see are many locals or professional photographers. Why? Because the scene is not nearly as interesting as it is with some clouds and autumn light. The famous photos are mostly taken during a storm or just after it clears. On a drizzly fall day, you’ll see the serious photographers out there with their big setups and umbrellas waiting for just the right cloud formation. If, however, you want a little more than what you can see from the car, go across the street from the main lookout and start hiking up the Pohono Trail. After about a half mile, you encounter the old road. Turn left and hike about half a mile downhill until the view opens up (if you keep your eyes open you’ll see a USGS survey marker too). This is Artist’s Point. It’s close to (thought not exactly) the point where Thomas Ayre’s made the first known sketch of Yosemite in 1855 and where generations of artists and photographers planted their easels and tripods until the Wawona Tunnel rerouted the road in 1931.
  • Hite’s Cove (El Portal area down Highway 140). This is technically a few miles outside the park, but if it were anywhere else, it would be a major destination hike. In fact, I think if it were inside the park, it would be a major destination hike. The trail is very steep right at the beginning, but soon mellows out and contours along the steep hillsides of the South Fork of the Merced River. It’s a striking landscape and after a couple of miles, you’ll descend to the level of the river to some interesting black rocks with swirls of white quartz that makes a nice lunch spot. If you want a long hike, you can go all the way to the ghost town of Hite’s Cove. All that remains now is a bit of mining equipment and a few foundations, but the town once boasted a hotel, a Chinatown and a sizeable population.
  • Mariposa Grove of the Giant Sequoias. Not to be missed and this is a great outing in any weather. We have been through the grove in sun, rain, snow and even a blizzard with huge snow avalanches coming off the trees. .
  • Tuolumne Grove of Giant Sequoias and the Merced Grove of Giant Sequoias (Crane Flat area). These are smaller groves and a longer drive. If you have time for just one, that would be the Mariposa Grove (hundreds of mature sequoias instead of 10-20). But the others are quite enjoyable as well.

Longer Activities for Snow and Rain

  • Four Mile Trail (Yosemite Valley to Glacier Point). If you aren’t afraid of the snow and rain, then you can pretty much do anything you can do in the sun. There are a few things that can be extra special in November, though. Assuming Glacier Point Road is closed, but the Four Mile Trail is open, you can make the long hike up to Glacier Point (9.5 miles round trip or 13 miles if you go down the Panorama Trail). That said, once we get our first decent snowstorm, the Four Mile Trail will close until spring. To find out current status, check the NPS Trail Conditions page. The reward for this long trip? You stand at Glacier Point much as John Muir and Theodore Roosevelt did with no crowds (Muir and Roosevelt camped near Glacier Point in March and received about six inches of snow overnight). When we have gone there when the road is closed and the ski area is not yet open, we have been alone for hours. Yes, the railings are still there and all the signs of civilization, but it’s the quietest it gets in the twenty-first century. A wonderful experience.
  • Mist Trail (Yosemite Valley). The most popular trail in the park. On a busy summer day, as many as three thousand people start up the trail. You typically won’t be completely alone here even on a rainy day in November, but you just might be. If not, you’ll at least have a quiet experience and the extra flow in the river will not detract from the falls. This trail does not close, but gets rerouted around two dangerous areas once the cold weather hits and it ices up. See the NPS page about the winter route for details. The pleasure of this trail is the rushing water and, of course, the falls, so it’s a great choice for days when visibility is limited.
  • Chilnualna Falls Trail (Wawona). This trail is fairly long (about nine miles round trip), but there are nice cascades in the first quarter mile if you just want a quick hit. If you’re feeling good, keep walking. The top cascades are in three levels. You arrive at the top of the first one, a bit more hiking brings the second into view and then the upper cascade is one more switchback up.
  • Upper Yosemite Falls Trail (Yosemite Valley). This is a steep, rocky trail, but if the rain is falling, the falls are flowing. Go as high as you want, but you have to get about halfway for a good view of the falls.

If Glacier Point Road and Tioga Pass Are Still Open

I would expect Tioga Pass to be open most years in the beginning of November and closed in most years by the end of November. Most of our guests on short stays do not have time to get up to the high country (it’s a 2-hour drive to Tioga Pass), but if you have time, it’s an amazing place with high-alpine scenery quite different from what you’ll see in the Yosemite low country.

Glacier Point is similar, though there is a slightly greater chance of it being open and it is quite close to our home. So if it’s open, it’s definitely worth a drive if staying at Alpine Escape. If you are up for a hike, I recommend:

  • Sentinel Dome: 2.2 miles round trip, with panoramic views of the high country
  • Taft Point: 2 miles round trip, with great views into Yosemite Valley.
  • Taft Point to Sentinel Dome Loop: 4.8 miles with the best of both, plus some bonus views out over the Valley.
  • Dewey Point: 7.8 miles round trip, with more rolling terrain than a lot of Yosemite walks, ending in a great view straight across at El Capitan.

Will Glacier Point Road Be Open? Will Tioga Road Be Open?

We don’t know in advance, but we have some thoughts about when Tioga Road and Glacier Point Road will close (and open).

Wrap Up

There is plenty to do in November, but the key is to come ready for anything. Watch the forecast, select your clothes and toys accordingly!

Snow Chains for Yosemite and Winter Driving Tips

Chain Control Sign below Yosemite Falls

Will I need chains in Yosemite?

Ah. The perennial question: “I’m coming in Winter Month X. Will I need chains?”

The reason this is so hard to figure out is that there isn’t an easy yes or no answer. Chain requirements depend entirely on the road and weather conditions. February with no snow? No chains needed. Early October with a freak storm that drops 2 feet of snow? The rangers are going to want you to have some extra traction in the snow. Better have chains. 

One of our early trips to Yosemite, shortly after we moved to California, was in late October and an early storm left the roads snowy and icy. We did not have snow chains and were turned around at the gate and drove sadly home to Berkeley instead of enjoying a weekend of climbing in Yosemite (only to find out later that they lifted the chain controls two hours later as the ice melted off in the late-morning sun).

To help you have a smoother trip and increase your chances for success, we’ve put together this comprehensive resource on snow chains for your Yosemite visit. We intend it to be the best page on the web about snow chains in Yosemite and to provide the following information:

Skip the Details. What Should I Do?

If you want our shortest possible answer, it’s this. You should plan on carrying chains November through March. We recommend renting an all-wheel drive vehicle if you don’t have one as it is rare that the authorities require AWD vehicles to chain up.

If you do come in an AWD vehicle, remember that you are still required to carry chains, you’re just not required to have them on the wheels. Legally, CalTrans, CHP or NPS personnel cannot let you pass the checkpoint if you do not have chains, even if you have a 4WD and are not required to have chains on the wheels at the exact moment you pass the checkpoint. This particular rule is unevenly enforced, but it is the law everywhere in California, whether enforced for not.

Really, the above is probably all you need to know. There is a lot more you could know. If you want a really comprehensive knowledge, read on.

When You Need Snow Chains in Yosemite (Whether You Think So or Not)

The short answer:

If chain controls are in effect, you must have chains with you, whether you are driving a Maserati with race slicks or a Jeep Rubicon with four studded tires. If you’re in the Rubicon, you may not have to put the chains on your tires, but you will be in violation of the law and subject to fines if you do not have them.

If chain controls are not in effect and you deem the conditions dangerous, then you either need chains or you need to sit tight and wait until conditions improve. We have chained up a couple of times when conditions did not legally require us to use chains on our 4WD vehicles, but in fact it was so icy that we needed them, regardless of the legal requirement. That is exceedingly rare, however, as chain controls are applied rather conservatively.

Okay, so when are chain controls in effect?

There are no set dates. Chain controls are in effect when conditions merit.

  • It is rare to need chains in October or May, but it can happen. We had multiple days of chain controls in October 2021.
  • It is common to need chains December through March. We have had drought years without any chain controls until late January.
  • In December and January when the sun is low and trees shade the roads, even a small storm of a couple of inches can result in chain controls being in place for many days.
  • By late March, however, a foot of snow gets plowed and by the second day, as the sun burns the ice off the road, the authorities lift chain controls rather quickly, usually within a day of the storm ending, sometimes later that same day. That said, we can get huge storms in March — from March 22-25, 2011, it snowed 11 feet at our elevation and the park closed for almost a week.
  •  Elevation matters. When a storm rolls in, lower elevations in the park are more likely to get rain instead of snow. So, you may be fine driving without chains at 4000 feet in Yosemite Valley, but need chains to go up to the ski area at 7000 feet.
    • Hwy 140 is also called the “All-Weather Highway” because it is the lowest road into Yosemite Valley and therefore is the most likely to be snow-free or have lower chain restrictions on it. When driving in the winter, it’s often faster to take this route even if the mileage is a bit longer.
    • The entrance to our neighborhood, Yosemite West, is at 6000 feet. This weather forecast is specifically for the high point of Highway 41 and gives the best sense of likely driving conditions to arrive at our house.

So if you are planning a winter trip and it is more than a week before your trip, you should assume you will need chains.

If you are planning a winter trip for tomorrow, my answer may be different. If the following three things are true, you may choose to forego chains and hope for the best:

  1. The current road report says that chains are not required anywhere along your route, inside or outside the park.
  2. The forecast is absolutely clear with forecasters saying there is a 0% chance of precipitation.
  3. The end of your trip is less than five days away (forecasting accuracy goes way down around the five-day mark).

If any of those things is not true and it is November through March, we strongly recommend carrying chains.

How do I know that chain controls are in effect?

This is easy.

Chain Control Sign below Yosemite Falls

If you’re driving along and see a sign that looks like the one in the picture, you need chains. Again, whether you must put them on our not, you must carry them. It makes no difference whether you have 4WD, whether it violates your rental agreement or violates the warranty on your vehicle. If you want to drive past that sign, you must have chains.

  • The NPS or Caltrans road report tells you that you need chains.

    • For conditions inside the park: Call the park roads hotline at +1 (209) 372-0200, then 1, then 1. They will tell you which roads, if any, have chain controls in effect.
    • For conditions outside the park: Call CalTrans at +1 (800) 427-7623 and enter the highway number you’ll be coming in on, or check conditions on the web for Hwy 41, Hwy 140 and Hwy 120.

What Does R2 Mean?

No, it has nothing to do with Star Wars. Generally, all road conditions reports will simply state what types of vehicles need chains, but occasionally they will use the “R” system where conditions are rated R0 through R3.

  • R0: no restrictions. A dry road is R0. Nobody is required to carry chains.
  • R1: All cars without snow tires with at least 6/32″ of tread depth and all vehicles over 6,000 pounds must have chains.
    • Mud and snow rated tires will have an “M+S” on the side. This is not the same thing as a true “snow tire” in the Midwest or Northeast where we learned to drive, and comes standard on most rental cars.
    • The amount of traction your tires have makes a big difference. If your car has road slicks, bald or significantly worn tires, put chains on. If you have less than 6/32 inches of tread depth on your mud and snow rated tires, they are no longer legally mud and snow rated. You’ll need to put chains on.
  • R2: You must have chains on your wheels if it’s a two-wheel drive vehicle. If it’s a 4WD or AWD vehicle, you must have chains with you, but you do not have to have them on the wheels if you have legal snow tires (must have 6/32″ of tread).
    • Pro-tip: Put your chains on at the pull-out by the chain control sign even if the road doesn’t look very snowy. The reason the rangers have changed that sign is that it will GET snowy before the next place you can safely pull off the road to put your chains on. The last thing you want to do is crawl around on the ground in the middle of the road with cars skidding by (on the slippery road) because you didn’t put chains on when there was a safe wide place to do that. Some of our scariest moments have been trying to avoid killing people lying on narrow, icy roads trying to put chains on.
  • R3: Everyone needs to have chains on. Unless you have a big red sleigh pulled by flying reindeer, the rangers will make you put on chains. Have them, and put them on.
    • The rangers rarely use this chain control level. One scenario would be if it were snowing all day or it’s warm and the road turns to a sheet of ice when people at the ski area need to get home. It’s the end of the day, so there are a lot of cars all leaving at once, and if one car goes off the road it impacts a lot of people.
    • Pro-tip: If there is a storm forecast for the day there will be a ranger check-point on the road to the ski area making sure everyone has chains. Do NOT lie to the ranger and say you have chains when you don’t. One long-time ranger we know, now retired, took perverse pleasure in turning people back at the R3 checkpoint and saying “Well, when I asked you this morning, you said you had chains in the car.” Those people do not get to leave the ski area until the ranger deems it safe to do so. Some people have spent the night on the floor of the ski lodge (usually, around 6pm when all the traffic is cleared, they’ll change it back to R2).

Remember, if it’s R1 or R2 and you have a 4WD, you nevertheless must have chains that fit your wheels with you in the car. If you do not, the CalTrans or Park Service employee at the checkpoint may stop you or possibly even fine you.

Why does Yosemite have such weird rules regarding snow chains?

Alpine Escape driveway after storm on March 27, 2011

It doesn’t. We get this question a lot about chain regulations and traffic laws in general. Yosemite follows California traffic law, so everything regarding snow chain laws and their application applies both inside and outside the park.

In Yosemite, as all along the West Coast, tire chains are much more common than in the frigid north where we grew up. At first this seemed ridiculous — we had driven all our lives in snow without needing chains. But conditions in California in general and Yosemite in particular are a bit different:

  • Sierra storms are intense. Tom grew up in Vermont and Theresa is from Minnesota. We thought two feet was a big storm. In California, we have seen over ten feet fall at our house over the course of a few days. It is impossible to keep up with that volume.
  • Sierra storms are wet. The storms often come in wet and warm and then get colder. Means that as the snow falls and people drive on it, the surface compacts to a slick, icy surface that is rare in places where winter storms come in cold and dry. Early on, Tom saw someone off the road and said “What is that idiot doing?” and got out of the car to help. He didn’t even take a single step before slipping and landing hard on his butt. It was a wonder our car stopped at all.
  • They use no salt and little sand in Yosemite. In Vermont, they throw down salt and when temperatures climb to where the road would be getting really slick, it melts off. Not so here. Quite often they don’t even sand the roads and depend on drivers to put their chains on.
  • Sierra drivers are mostly from California. People here have little experience driving in the snow. They tailgate in the slipperiest road conditions you can imagine, just like they are in Bay Area commute traffic. They believe AWD makes them invincible and speed along like they’re on dry roads. Quite frankly, it’s insane out there some days. Chains help keep the speed down and and decreases braking distance. We’ve come to feel that even if we don’t think we need chains, we’re glad to see chain controls in place in order to slow down the other drivers.

So if you think, as we did when we first got here, that chains are really unnecessary, trust us. It’s different here than in Minnesota or Vermont or wherever you’re from.

Sizing

Chains, like tires, come in sizes. You must get the size of your tire before buying chains. Look for a number that looks like 215/65R16. We’re American. We like things complicated. We laugh in the face of those who insist their measurements come all in one type of unit, all in multiples of ten. So those numbers are in three different units: millimeters, percentage and inches. So in that example, the tire is 215mm wide, the height is 65% of the width and it goes on a 16-inch wheel. The “R” means it’s a radial.

Of course, you don’t need to know all that. You just need to write the number down and make sure they chains you buy fit that size tire.

Chain Types: Two Good Options and Two Options You Must Avoid

Now let’s look at some of the major chain options along with the pros and cons of each. First, so you know what we’re talking about and since an image is worth 1,000 words…

Let’s look at the pros and cons of each.

True, Classic Chains

Security Chain ladder style true chains
Peerless Auto Trac Snow Chains

For really rough conditions, I think these give the highest performance. With an aggressive set of chains, I once drove the wrong way up the highway and up the on ramp in 18 inches of snow in a Ford Escort. I made it to a hotel while 3,200 cars were stuck on the road. With four chains on a 4WD, you’ll feel invincible.

Pros

  • Excellent traction on ice (good penetration)
  • Excellent traction in snow (because they bite deep).
  • Diamond-style chains are among the easiest to apply (while ladder-style chains are among the hardest).
  • Field-repairable with “rapid links.” That is chain links with a ferrule that lets you link a broken chain, like this:

Cons

  • Roughest ride (especially ladder style)
  • Requires a lot of clearance. Not compatible with low-clearance vehicles
  • Can void the warranty on some AWD vehicles
  • Ladder-style chains are usually the toughest to apply (while the diamond-style are among the easiest).

Ladder vs Diamond Pattern Chains

  • Diamond chains have better starting, braking and steering, because you are less likely to end up between the “rungs” and sitting on plain tire.
  • Diamond chains have a smoother ride, because you only drop to the ground every other set.
  • Diamond chains are usually easier to install, not because there’s anything inherent in the diamond pattern, but because these are typically “deluxe” chains that are designed for quick and easy install.

Examples

This is just a sample. Of course, you must make sure you get the one that is the right size for your tire.

Cables

Security Chain ladder style cable chains
Security Chain Z-style cable chains

Like chains, cables come in a variety of patterns, generally ladder and “Z” style (see photos). And, as for chains, the Z-style outperform the ladder style in starting power, stopping power and steering control. Even more than with ladder chains, I see people all the time with ladder cables where they turn the wheel, but because they are in between “rungs” the cables don’t grip.

Compared to chains, most cables have terrible performance. This is because most of them protect the cables with round tubes. I constantly see people spinning their wheels on ice as the round tubes just slip and slide. Ladder-style cables are acceptable if your goal is merely to meet the legal requirement, which may be the case if you have an AWD vehicle. Generally, with an AWD vehicle and the cheapest cables, you’ll be good to go. That said, we have gotten stuck in our Subaru with cables in a situation where our old Ford Escort with true, diamond-style link chains would have easily powered through.

Peerless, who makes all styles of chains and cables, claims that their most aggressive lines of Z-Chain cables are equal to diamond-pattern link chains. I’ve never tried them, so I can’t say, but the rest of their comparison chart rings true with my experience. These chains have a lot of small rings, rather than fewer, longer tubes. If you want traction and safety, get the Z-Chain cables, but they may be hard to find at a local retailer.

Examples

  • Peerless Z-Chain, the highest performance cable chain
  • Peerless Super Z6, has almost the performance of the Z-Chain, but is designed for vehicles with very limited clearance.
  • Basic ladder-style cable chains. Cheaper than dirt, but without the performance advantages of dirt (which is quite good on icy roads). Basically junk and suitable only for meeting legal requirements.

Autosocks and other alternatives

Autosock snow chain alternative

If your vehicle warranty or lease agreement prohibits any type of chain, you should nevertheless be OK with Autosocks(TM) or similar. Other brands with the same concept include ISSE and the Peerless Supersox. These are all basically fabric covers that go over your wheel and improve traction either through textile fibers that grip the snow and ice (Autosock and ISSE) or embedded studs (Supersox). Another intriguing alternative is the Michelin textile “chain” which is basically a rope net that goes over the wheels.

These company make lots of claims, including the claim that these products have better stopping power than chains, as verified by independent testing labs. I find this hard to believe and Consumer Reports testing backs that up. They found that these socks had traction similar to a good set of winter tires. They did not make a direct comparison to chains, but having driven with good winter tire and good chains, I can say that the grip chains provide is vastly superior to good snow tires. That said, good snow tires are vastly superior to mud and snow rated all-season tires.

That said, they do have some serious advantages:

  • Work with all vehicles from very low clearance to semi trucks
  • Much better traction than all-season tires alone and probably at least as good as the junky ladder-style cables.
  • Smooth ride
  • Easy application

And some disadvantages

  • Can be expensive, but so are decent chains
  • Probably less traction than good chains, but that may be open to discussion.
  • Poor durability if driven on dry pavement.

The last point is a big negative in Yosemite. On our narrow roads, there are only a few chainup points. That means that the rangers will sometimes force you to chain up a few miles before the snow. So if there’s two miles of snow at Chinquapin, you may have to chain up at Mosquito Flat and keep your chains on until Grouse Creek. That’s roughly 10 miles and, according the manufacturer, not good for the textile traction devices.

That said, for occasional use, I have heard good things and I do know one person who used them and gave them the thumbs up.

There are lots of other systems too. Some screw into your hub and reach around like claws (brand name: Spikes-Spider). Some come in several pieces and you attach them at intervals around your tires. Lots of these are legal, but honestly, I see so many people have issues with these. I usually notice the ones that attach to your hub because they are broken and creating a racket. I’ve seen many people stuck because as the wheel comes around, the “arms” just bend out of the way rather than gripping. Unless your vehicle allows you no other option, we do not recommend these

Examples

Decisions, Decisions! Which should I buy?

  • If you have a two-wheel drive passenger car or truck with normal clearance and you’re pretty sure you’ll use them eventually, get the diamond-pattern chains with all the easy-attach bells and whistles. They’re just better. You might also consider the Z-Chain though.
  • If you have an all-wheel drive vehicle or you think you’re unlikely to use them, go cheap.
  • If you have a car with low clearance, get the Super Z6 from Peerless.
  • If you have a very low clearance vehicle or your warranty or lease agreement prohibits the use of chains, look into the Autosocks.

Snow Chains on Rental Cars

We often get questions from guests who say they checked with the rental car company and their company does not allow chains on their vehicles. This is quite common and it’s why we recommend reserving an AWD vehicle for winter visits. Though you still have to carry chains, it’s rare to be forced to put them on an AWD car. Barring that, your option is to take your chances. You may violate the rental agreement and, thus, be bound for any damage the chains do.

Most damage chains cause is the result of the chains being installed incorrectly, usually simply too loosely or with loose ends rattling around which take the paint off around the wheel wells. We have also seen chains that were not fastened on the inside of the wheel and which come off and wrap around the brake lines. Needless to say, that is not only expensive, but super dangerous.

The best thing to do is to put snow chains on correctly. Simple as that and you shouldn’t have any damage to the car. 

Buying or Renting Chains for Yosemite

First off, you can buy them in most cities in California. Alternatively, all the links and photos above are from Amazon. You can find almost every size and style on Amazon and get a sense of prices.

As for renting, we don’t know of anywhere that still does this. There may be places that still do, but the problem with chain rentals is that many people find it hard to get back to the rental shop during regular hours and chains frequently break, so the shop doesn’t get many rentals out of set. More common these days is to offer a 50% refund if you bring them back unused. You can look at it as a rental that costs about half the cost of the chain as long as you don’t use them. Given the lifespan of chains and how people use and abuse them, this seems reasonable to me. Apparently Les Schwab will give you a full refund if you bring your chains back unused in the spring. There is at least one Les Schwab store on all the routes into the park from the west (Fresno, Merced, Oakdale and more — see the store locator).

Finally, you can buy them en route to Yosemite in a gateway community.

Every gateway route has an O’Reilly and Oakhurst and Oakdale have NAPA stores. On Highway 41, Sullivan’s Tire Pros has chains and Autosocks (and have been really, really honest and forthright with as customers since 2003), but they are open regular business hours only, Monday through Saturday, so maybe less convenient.

The map below shows chain retailers in Oakhurst, Oakdale and Mariposa. If you know of a retailer we should add, let us know.

Retailers

There are countless places that sell chains all up and down every gateway highway. Little general stores, hotels and more. There are too many to list, but these major car parts stores will have a good selection.

Highway 41 Corridor (Oakhurst and Coarsegold)

Sullivan’s Tire Pros
40126 Highway 49
Oakhurst, CA 93644
Phone: (559) 683-5900
We’ve been doing business with these guys for years and they have been great. At last check, they stocked a full run of Autosocks

O’Reilly Auto Parts
40080 Highway 49
Oakhurst, CA 93644
Phone: (559) 642-4644

NAPA Auto Parts
40120 Highway 41,
Oakhurst, CA 93644
Phone: (559) 683-7440

NAPA Auto Parts
35335 Highway 41,
Coarsegold, CA 93614
Phone: (559) 658-5550

Highway 140 Corridor (Mariposa)

O’Reilly Auto Parts
4907 Joe Howard Street Mariposa, CA 95338
Phone: (209) 966-3697

Highway 120 Corridor (Oakdale and Manteca)

O’Reilly Auto Parts
505 East F Street Oakdale, CA 95361
Phone: (209) 848-0310

Tilbury Auto Parts Inc (NAPA)
300 E C St,
Oakdale, CA 95361
Phone: (209) 847-0316

O’Reilly Auto Parts
515 Yosemite Avenue Manteca, CA 95336
Phone: (209) 239-4188

O’Reilly Auto Parts
1200 West Lathrop Road Manteca, CA 95336
Phone: (209) 239-9606

NAPA Auto Parts
840 N Main St,
Manteca, CA 95336
Phone: (209) 823-7107

Using Your Chains

Chains are not especially hard to use, but a few simple tips will help.

Uh Oh! This is a front-wheel drive car!
  • Practice putting your chains on at least once in a dry parking lot during daylight. Really. Do this!
  • Put your chains on the drive wheels. Yeah, that seem obvious, but we constantly see people who have their chains on the wrong wheels. Tom had an accident a few years ago when on icy roads when he came around a corner and there was a car stuck in the middle of the road because he had chains on the rear wheels of a front-wheel drive car. Even at 20mph, it was too late to avoid him.
  • Stay safe — we often see people half in the road on a blind corner putting their chains on. They are risking their lives. The chain control signs are located where they are because this is usually the last safe place to pull over and put them on.
  • Carry a flashlight, a tarp or garbage bag and gloves.
  • A couple of bungees will make it easier too and dramatically reduce the chance of damaging your vehicle. There are special snow chain tensioner bungees that have four or more hooks. These are worth it. You can get them on Amazon and in any store that sells chains. If you don’t have those, however, a couple of standard bungees per wheel will be better than nothing, but they can shred, which is not good.
    class=”right”>
  • Retighten right away. After you first put on your chains, drive forward a few feet and tighten them again. If you have room, do it one more time, driving a bit farther before tightening. If there’s a pullout, stop and check them again at the first opportunity. This will save your chains and your car.
  • Keep the wheels rolling. You still won’t have great traction on the other two wheels. It is crucial to avoid braking hard. Downshift rather than braking if possible. If your wheels start to slide, pump the brakes rapidly. This is the #1 reason we see people go off the road — they hit the brakes, the wheels lock up and they stay on the brakes and off the road. Only a rolling tire can be steered. Pump the brakes as rapidly as you can, about twice per second, until you come to a stop. Practice a bit if you can. If there’s a snowy parking lot, skid around in it until you get a feel for this.
  • Don’t spin the drive wheels ever. If the wheels spin, let off the gas right away. Absolutely do not gun the engine unless you want to destroy the chains and possibly cut a brake line. I see people ruin their chains all the time this way and then they are completely stuck and have to call a tow truck. It never works.
  • Don’t spin the drive wheels EVER. Did I mention this? Okay, well, there it is again. And once more: do not spin the drive wheels. Just don’t.

Winter Driving – How to Drive in the Snow

  • Not too fast: When the roads are slippery, you won’t be able to stop quickly. This makes it incredibly important to stay alert and keep your speed down.
  • Also not too slow: The winding mountain roads in Yosemite have banked corners. This is great in the summer, but if you’re going too slowly on icy roads, you can actually slide sideways to the interior of the turn. I’ve seen a car stopped on a slope break all 4 tires loose and simply slide sideways into the opposite lane or into the near snowbank more than once. I tend to shoot for a very steady and even 10-15mph in difficult conditions. On a banked road, it is dangerous to slow down below 5mph. If the conditions are too bad to drive 5mph, do not drive. Simple as that. At that point, you’re better off with ice skates than tires and chains.
  • Not too close: Give the car in front of you a lot of extra space. If it comes to a stop suddenly (for example, by hitting a snowbank because it’s slippery out), you will need to have plenty of space to stop… because it’s slippery out. Stopping distances can be huge, even at low speeds. We see so many people driving like they’re in Bay Area rush-hour traffic. Give yourself a fighting chance and leave at least 4 seconds between you and the vehicle in front. Count it out, 1001, 1002, 1003, 1004.
  • All-Wheel Drive does not make you God. AWD gets people into a lot of trouble. It’s very easy to get going fast, but everyone on the road has all-wheel brakes. Having AWD does not mean you can safely drive faster than someone with two-wheel drive. It just means you get into trouble a lot faster. And remember, the guy with 2WD has chains on his tires, so he is going to have excellent stopping capability. You will not. If you are in an AWD without chains and following someone with chains on their tires, give that person a LOT of extra space.

Resources

Major Regions in Yosemite

Yosemite National Park is roughly the size of the state of Rhode Island. Many people find it daunting to figure out how to plan their visit. We find it easiest to first think about the regions of the park: Yosemite Valley, the Mariposa Grove and Wawona, the Glacier Point corridor, Tuolumne Meadows, the Hetch Hetchy area and vast wilderness spaces of the park.

Those making a short visit of a couple of days will commonly see Yosemite Valley, the Mariposa Grove and Glacier Point. Those with a bit more time can add Tuolumne and eventually Hetch Hetchy. We have, however, had visitors who came for a week and spent all those days in the Valley.

Yosemite Valley

The “incomparable valley”

This is the famous, iconic Valley. People often refer to it as “the park” as in “We went out to Glacier Point and then into the park.” Of course, Glacier Point is part of the park (and has been since the original park was created in 1864). In fact, Yosemite Valley is only about seven square miles in a park of 1200 square miles. Despite that, for many people the Valley is Yosemite and Yosemite is the Valley and with good reason.

The sites and scenes that are the most famous and the most unique to the park are found in the Valley or on its border: Half Dome, El Capitan, Glacier Point, Royal Arches, Yosemite Falls, Bridalveil Fall, Vernal and Nevada Falls. The vast majority of Yosemite photos you see are taken here.

It’s here that you’ll also find the visitor center, bike and raft rentals, the grocery store, post office, Ansel Adams gallery and several dining options both casual (the Lodge cafeteria, Curry pizza deck, etc) and fancy (the excellent Mountain Room restaurant and the world-famous Ahwahnee Dining Room, a pricey gourmet restaurant at the Ahwahnee hotel).

Though incredible, the Valley is hot in the summer and locals looking to hike on their days off typically will be found out toward Glacier Point or Tuolumne Meadows when the sun hits hard. Alternatively, you can start super early which not only helps beat the heat, but also the crowds. For trails on the north side (and thus south facing), such as the Yosemite Falls Trail or the Snow Creek Trail, starting early is essential on a hot day.

Glacier Point

Carved by raindrops and snowflakes

No, there are no glaciers at Glacier Point. It is so-named because from there you see the confluence of the glacial valleys where Tenaya Creek and the Merced River meet. Ten to twenty thousand years ago, two large glaciers met there and the combined weight carved out the valley 2,000 feet below the current valley floor, which then filled in to the present depth with glacial debris.

Because of that debris, Glacier Point is “only” 3300 feet (1000 meters) from Yosemite Valley. Straight up. To get from the Valley via road, it’s a one hour drive or about 30 miles. Our home is roughly at the halfway point between the two. By trail, it’s 4.7 miles on the misleadingly named Four Mile Trail.

Glacier Point was part of the original 1864 park and offers a tremendous overlook of the Valley with views of the surrounding mountains and the Sierra Crest. It is especially popular for its evening views of Half Dome. There are some great walks in the region: Sentinel Dome, Taft Point, Dewey Point, Ostrander Lake make nice trips from points along the road. If you want to do what I call The Yosemite Half Marathon, you can hike or run up the Four Mile Trail, go to the Glacier Point Lookout, and then down the Panorama Trail to the top of Nevada Falls and then down either the John Muir Trail or the Mist Trail. If you choose the JMT, it comes out to almost exactly a half marathon from trailhead to trailhead.

NOTE: The Glacier Point Road is scheduled to be closed for all of 2022 for road work.

Mariposa Grove and Wawona

Land of the giants

The Mariposa Grove is the premier sequoia grove in Yosemite. There are two others: the Tuolumne Grove and the Merced Grove, but those two have a couple dozen trees each as compared to over 400 trees in the Mariposa Grove.

When the original 1864 state park was created, the Yosemite Grant saved two things: Yosemite Valley and the Mariposa Grove. Like Glacier Point, the Mariposa Grove is roughly one hour away from Yosemite Valley and our house is at roughly the midway point on that trip. Unlike Glacier Point, until 1890, the land between the valley and the grove was not part of the park. In other words, it wasn’t set aside because it happened to border the valley, but because it is in and of itself a natural wonder that, at the height of the Civil War, motivated Congress to create the first park of the kind in the world.

If I set aside rock climbing destinations and had to pick a favorite spot in the park, it would probably be the Upper Grove of the Mariposa Grove. It’s a nearly pure stand of sequoias and early in the morning or in the winter is typically deserted. It is, therefore, a “must-see” on a par with the famous valley itself. If your trip includes a day in one of the great groves of Sequoia National Park, we’ll let you off the hook on this one, but we think the Mariposa Grove can hold its own against any of the other groves (it’s a tossup for me whether my favorite grove is the Mariposa Grove or the Redwood Canyon Grove in Kings Canyon National Park).

While out at the southern end of the park, it’s worth visiting Wawona. The village of Wawona is home to the Wawona Hotel where Teddy Roosevelt ate lunch on his trip to Yosemite. He didn’t stay there though — he skipped the dinner party in his honor and ditched the governor and all the dignitaries to camp out in the Mariposa Grove with John Muir and Charlie Leidig and two horse packers. The next morning, he told Leidig to avoid civilization and keep to the mountains and they snuck by the sleeping dignitaries on their way to Glacier Point for a second night with Leidig and Muir.

Wawona is also home to the Pioneer Village, a collection of buildings from the Yosemite Pioneer days that is well worth the relatively small effort it takes to visit. The Wawona Meadow Loop is a great flower walk in season and the Chilnualna Falls Trail is an enjoyable walk to nice set of cascades.

Tuolumne Meadows

The Yosemite High Country

We finally get outside the original 1864 Yosemite Grant into the other 95% of the park that was added in 1890 when Congress created the national park very roughly as we know it now.

Tuolumne Meadows proper is a large alpine meadow, but for most of us we use the term to refer also to the vast high-alpine country along the Tioga Road. This is where the locals tend to spend their days off in the summer partly because it’s so much cooler up there at 8,000-10,000 feet than down in the Valley at 4,000 feet, and partly because it’s only accessible by car a few months of the year, so we have to take advantage of those months. The rest of the year you have to get there by skiing or walking.

There is certainly breathtaking scenery along the road, such as the views from Olmstead Point or Tioga Pass, but for most people Tuolumne means getting out of the car and hiking. There are numerous nice hikes in the four to ten mile range and you can also just relax by Tenaya Lake. From our house it’s about an hour and a half to Tenaya Lake and about an hour and three quarters to Tuolumne Meadows proper. The hikes along this corridor are countless. For backpackers, there are many loops of 50 or 100 miles, or you can hop on the Pacific Crest Trail here and hike to Canada.

Hetch Hetchy

Yosemite’s Lost Twin

Hetch Hetchy Valley was Yosemite’s twin valley. John Muir considered it the more beautiful of the two, because it had been completely spared from development… until it was dammed and flooded. If you go there now, you can see the dam and the reservoir that provides drinking water to San Francisco.

It’s a gentle relatively flat walk to go view Wapama Falls which runs in the spring and early summer. Along the way, you can stand on the dam and contemplate the loss of Yosemite Valley’s sister valley and envision what this valley would look like with another 430 feet of depth.

Hetch Hetchy is a fairly long ways from anywhere else in the park. To get there you need to actually leave the park by the Big Oak Flat gate and then drive over half an hour to get there. As such, it’s one of the less-visited parts of the park. For backpackers, it gives access to the wild and rarely visited northwestern part of the park. For dayhikers, it’s a bit limited though. There is the hike out to Wapama Falls and, just before Hetch Hetchy itself, the hike up to Smith Peak, from where the picture above was taken. In the right season, the flowers both along the drive and at the reservoir are fantastic though.

From our house, it’s over one and a half hours drive to get there.

The Backcountry

Wild Yosemite

Even if you have visited all of the regions in this guide and taken some ten-mile hikes, the fact is, you will still not have visited most of the park. To do that is almost a life’s work. There are still some trails we have not done. Many of these spots have a minimum hiking distance of sixty or seventy miles round trip to get in to see them. If you’re a serious trail runner, you might be able to do some of these as day hikes, but only the hardiest will be able to cover the seventy miles to get out to the remotest corners and back.

Location and Directions

Map showing house location, Yosemite Valley, Half Dome

Our house is down deep in the Yosemite West neighborhood. The road in the neighborhood winds back and forth many times, but the directions on how to get to Alpine Escape are simple. Just keep going to the right.

Below you will find


Printable Directions

Download a printable PDF (390KB – right click and choose “Save as” to download).

We strongly recommend printing out the directions. Among other things, a paper printout doesn’t require a cell signal and they will show you exactly where to park and other helpful tips for arriving safe and sound.

Please print or save to your device these maps and directions and take them with you.


Using Your GPS

Most of the GPS systems out there — Google Maps, Apple Maps, Waze — will bring you straight to our house if you put in the address.

7193 Yosemite Park Way, Yosemite National Park, CA, 95389

Two important caveats

  1. You must start navigating before you lose cell/data reception. If you wait until you arrive at the park gate, you won’t have cell reception and you’ll be in double trouble – no printed directions and no access to mapping apps. 
  2. Pull into the narrow driveway right in front of the front door

Maps

Click image to view full size


For the tech fiends in the audience, you can use longitude and latitude :-)
Longitude: -119.721935
Latitude: 37.648179


Directions

Coming from San Francisco, Sacramento or the East Entrance to the Park

  • Take Highway 120 East (or 120 West if coming from the east) to Crane Flat and follow the signs to Yosemite Valley. Crane Flat is your last gas.
  • Upon entering Yosemite Valley proper, you will have to take a right onto the one-way road around Yosemite Valley. You will immediately cross Pohono Bridge. Follow the directions from Yosemite Valley from there.
  • In the winter, it is better and usually faster to go south to Merced and take Hwy 140 through Mariposa and El Portal into Yosemite Valley. The grocery shopping is not as good, but the road is at lower altitude and rarely has snow.

Coming from Yosemite Valley

  • From Yosemite Village, follow the Valley Loop road as if making to leave the park, until you reach the intersection where Hwys 120 and 140 enter the Valley. Turn left and cross Pohono Bridge. This is the only left turn after El Capitan.
  • From Pohono Bridge, continue toward Bridalveil Fall and turn right, following signs to Hwy 41, Wawona or Fresno.
  • Stay on Hwy 41 past Wawona Tunnel (fantastic views of Half Dome, especially at sunset)
  • It’s about 7.5 miles from the Wawona Tunnel to the Yosemite West turn-off, which is the only road on the right for about 20 miles.
  • Look for the Chinquapin intersection with some large parking areas, and white government buildings (including a restroom). There will be a road going up to the left toward Glacier Point or Badger Pass.
  • The right turn into Yosemite West is about 0.2 miles past the Chinquapin intersection, and is marked with a big brown sign. If you start going downhill, you’ve missed it.
  • Turn right onto Henness Ridge Road and then follow the “In the Neighborhood” directions.

Coming from the South Entrance via Los Angeles, Fresno, Oakhurst, Fish Camp, or Wawona

  • Stay on Hwy 41 past Fish Camp and through the South Entrance to Yosemite National Park.
  • Turn left (the road to the right leads to the Mariposa Grove of Giant Sequoias)
  • Pass the town of Wawona (a historic Victorian-style hotel, gas station and gift shop on the right; golf course to your left). Wawona is your last gas on this route
  • The Yosemite West turn off is ~12.5 miles from Wawona just past the apex of the road. The Nature Bridge Educational Campus is on your left and the entrance to the neighborhood is just after you see the campus. It is the the only left turn for over 20 miles and the first buildings you will see after leaving Wawona.
  • If you get to a big intersection with white buildings (restrooms!) and a road leading to the right you have gone about 0.2 miles too far. Pull into one of the parking areas and get turned around.

In the Neighborhood

The total distance from where you leave Highway 41 until you arrive at the house is 2.7 miles. Numbers in parentheses are cumulative mileages from the intersection with Hwy 41.

  • First Y intersection: turn right — at the mailboxes (0.7 mi from Hwy 41).
  • Second Y intersection just past the guard rail (1.1 mi): turn right and head down a steep hill. Use caution in winter. Slow way down.
  • First T intersection (1.7 mi): turn right — left is a cul de sac. Follow this up, around a large horseshoe bend, and back downhill again. You will pass Buck Brush on your right and Black Oak on your left. Stay on Yosemite Park Way.
  • Second T intersection (2.7 mi): turn right — again left is a cul de sac.
  • Alpine Escape is the second house on the right — a tan house between a gold-colored house and a large log house. Park in the FIRST driveway (the narrow one directly in front of the front door, not the one with the parking meter on the side of the house).

Remove all food, trash and scented items from your car. Bears will destroy your car door and perhaps your car interior to get at food and this will result in the bear being put down by rangers. Protect your car and our bears by bringing all food inside.

Kick off your shoes, relax and have a great stay in Yosemite!